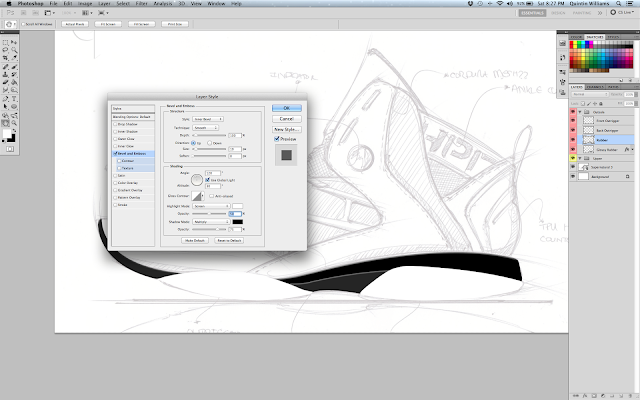
Day 3! Today we will be giving the outsole a three-dimensional look. We will do this by using the Bevel and Emboss effect, Texturizer, and Airbrush Tool.
Step 1 is to go to your Outsole Group and double click on the bottom layer. This will bring up your Layer Style box as pictured above. Click on the Bevel and Emboss tab on the left side and scroll the Size to the pixel size you feel looks best. Be sure that the direction of the emboss is on Up. Once this is done, Press OK.
Tip: When using the Bevel and Emboss effect, if you don't like how "glossy" the highlights are on the area you're embossing, we can adjust the highlights by going down to the Shading Area and scrolling the Highlight Mode or Shadow Mode up or down (see second image above).
You will use this step for each layer until each piece of the outsole looks as three-dimensional as you see fit.
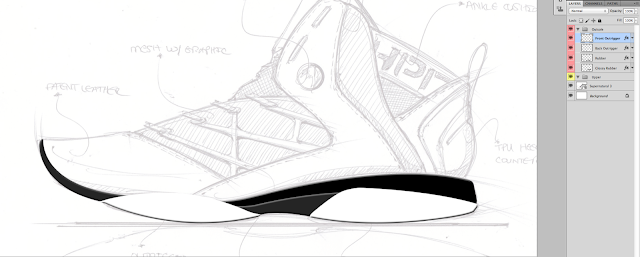
Once you are done adding the Bevel and Emboss to each layer, it should look like the above image. From here we add texture to the areas we want.
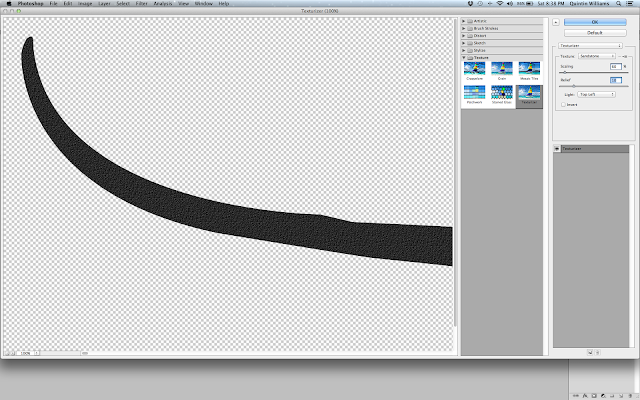
To add texture to a layer is very simple. Click the layer you want to add texture to, then click Filter > Texture > then Texturizer. Once you click Texturizer, the dialog box above will come up. In the drop-down box, be sure the Texture is set on Sandstone. You want to scroll the Scaling and Relief until you feel you have the texture you want. Once all done, Press OK.
Tip: Use sandstone texture for all outsole components that will be made of rubber. In this rendering, the Rubber, Back Outrigger, and Front Outrigger layers will have a sandstone texture.
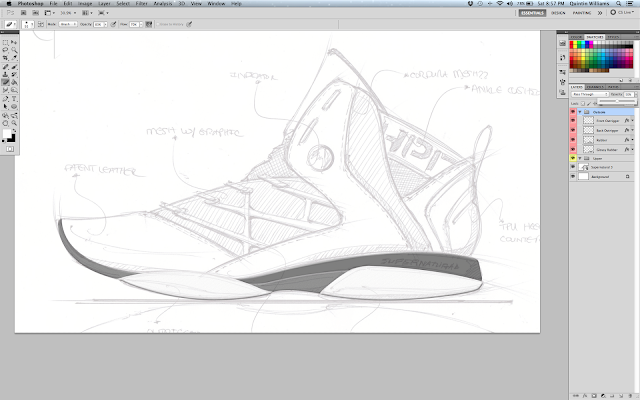
Once each layer has texture on it (in this case, Rubber, Back Outrigger, and Front Outrigger), you can move on to add more highlights and shadows by using your airbrush tool. First step is to lower the opacity of Outsole Group by scrolling it to 50% like the above image. This will allow you to see your sketch underneath the layers to use as a template.
We will use the Ellipse Tool to help get our outriggers more pronounced. To select your Ellipse Tool, key U, then go to the top toolbox and click all of the icons you see above to make sure you have the correct settings.
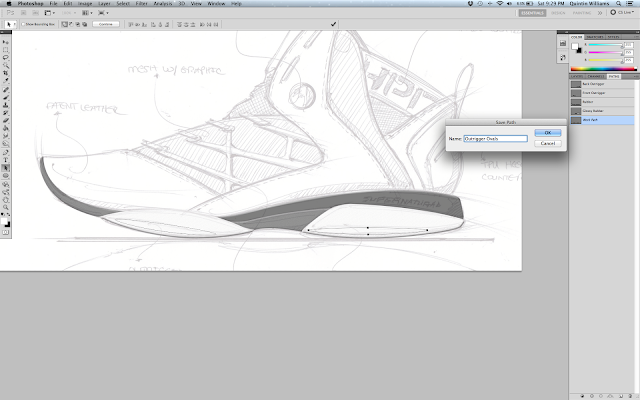
To use the Ellipse Tool, you simply click and drag it to the size you want. You can manipulate the size or rotate it by clicking on the path and pressing Command + T. Once the two paths are created and rotated correctly, you want to name them Outrigger Ovals in your paths tab like the picture above.
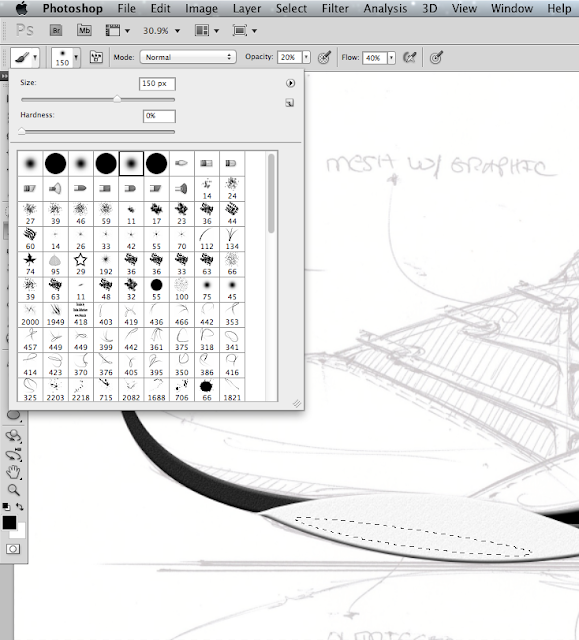
To use your airbrush tool, key the letter B. This brings up your brush tool. Once you have this tool, go up to the drop-down box and click a "soft" brush, lower your opacity to 20% and flow to 40%. Make sure your brush color is on black as well. Once all is set up, click the Enable airbrush mode button. It is located to the right of the flow box. This will give your brush a smooth transition while adding highlights.
Tip: To increase the size of your brush, Press ]. To decrease the size of your brush, Press [. These hot keys also apply to your eraser tool.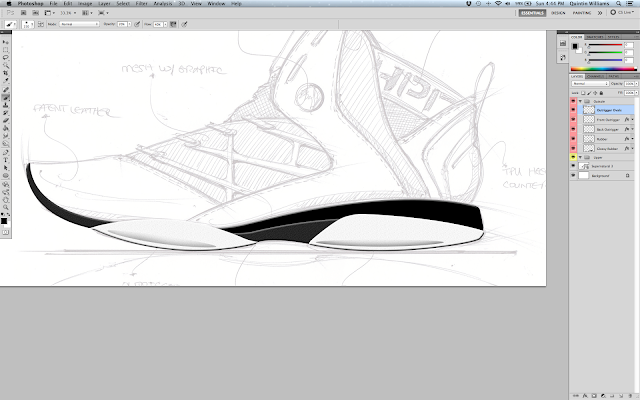
Next step is to make a new layer for where you will use your airbrush to brush that ovals, I named mine Outrigger Ovals. Make your oval paths "march" and brush your ovals until it looks similar to the above image.
Once that step is finished, you want to make the hard edges of the oval soft by blurring them. We will use the Gaussian Blur tool for this. Make sure you're on the Outrigger Oval layer, go to the top and click Filter > Blur > Gaussian Blur
When you Gaussian Blur box appears, adjust it until the ovals are blurred to your liking. Press OK. You will continue to use your airbrush and Gaussian Blur tool to add highlights and shadows to the rest of the outsole.
Tip: If you overbrush an area, you can always undo the step by pressing Command + Alt + Z. Or simply use your eraser tool using a soft brush by pressing E and adjusting the settings.
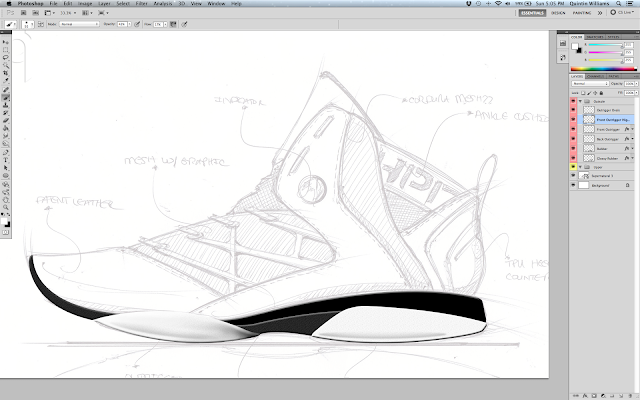
Once you finish airbrushing each part of the outsole, it should look similar to the picture above. That's the end of Day 3! If this was your first time using the airbrush tool and you can't get the 3-D effect you want, don't worry! This is a skill that takes lots of practice! It's only a combination of airbrushing and erasing. You will get better in due time.
Day 4 we will be constructing the upper with materials. Feel free to email me about anything you don't understand. Until next time. |
No comments:
Post a Comment