Day 2! Today we will be outlining each part of the outsole design by using the pen tool. Once we have outlined each section, we will then fill each section with our color of choice using the bucket tool. Let's get to work!
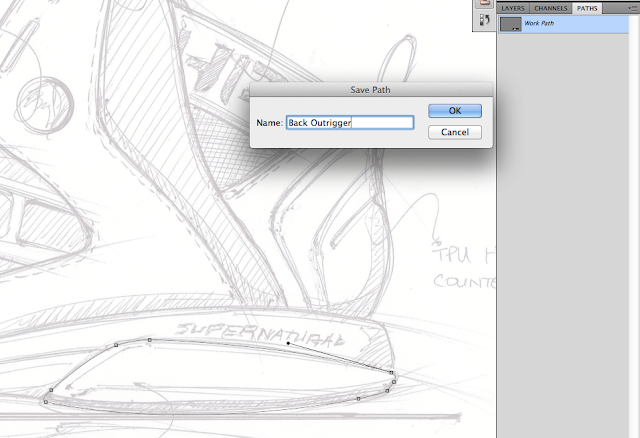
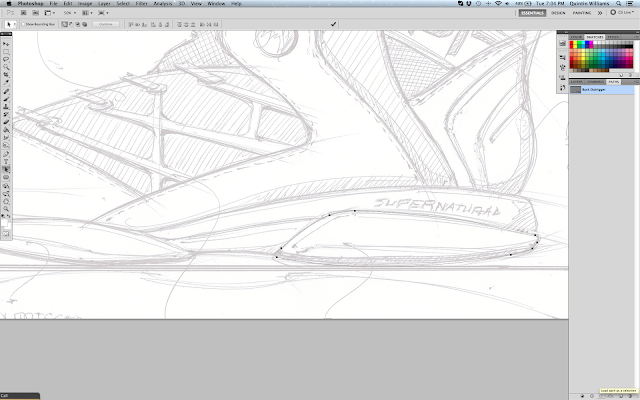
We will begin by outlining the back outrigger of the outsole. For those who haven't used the pen tool before, let me explain how it works. Key the letter P to bring you to your pen tool. Once you see the pen icon on the screen, you will then click to create an anchor point. Once that first anchor point is created, click and drag to create another curved anchor point.
To move on to another anchor, hold Alt while clicking on the last anchor. This while give you the ability to click and drag another curved line. You will continue to do this until you outline the entire section.
To finish the section, you will have to "close" the path. You do this by holding Alt and clicking the first anchor point. The pen tool will let you know when you're about to "close" the path because it will show a small circle on the right side of the icon.
Once the path is closed, click on your Paths tab, double click Work Path and rename the path whatever you see fit. You must rename the path! If you don't, once you move on to the next path the previous will be erased because it was consider a Work Path.
Also note that once one path is completed and closed, but sure to Press A then Esc. This while deselect that path so that the next path will start on it's own path layer. This is very important because you will want each path to be separate.
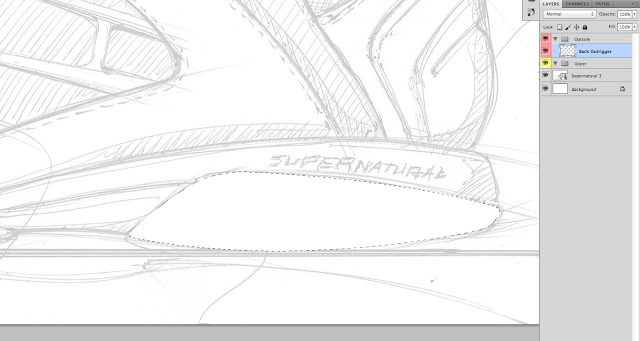
Next step is to fill in your newly created path by making it "march" and filling with your color of choice with the bucket tool.
Press the A key to use your Path Selection Tool, click on the Path, then in your Path tab go to the bottom and click Load path as a selection button. This will get the path "marching" as the image above shows.
Once the path is marching, you want to create a new layer underneath the Outsole group. Name this layer the same name as the first path. You want to stay consistent with your layer and path names so that you know which ones correlate with each other.
When you finish naming the layer, Press the G key to bring up your Bucket Tool. Select the color you want and click inside of the "marching" path. Once the path is filled, Press A then Esc.
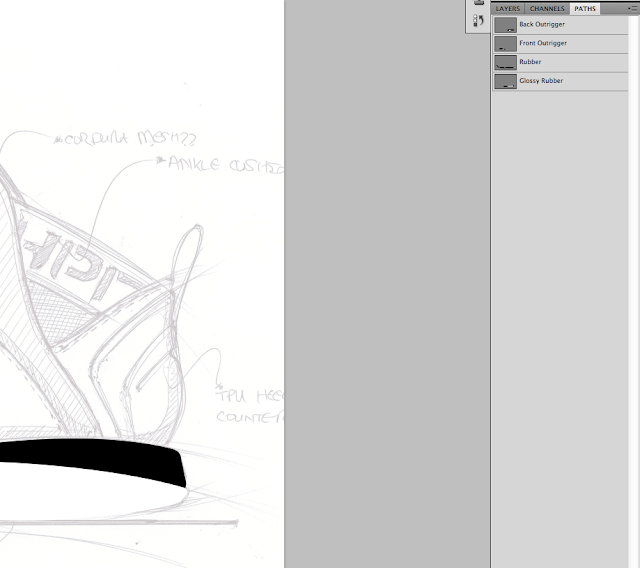
Once all of your paths are completed, your Path tab should look similar to the image above.
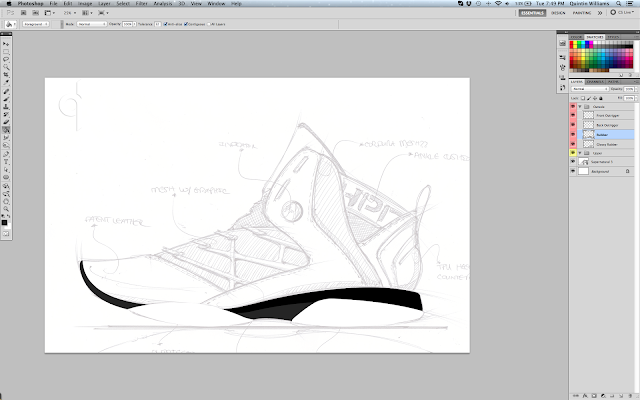
Next step is to fill each path with your color of choice like the previous step. Make sure you fill each path on a new layer. You make a new layer by clicking the Create a new layer button at the bottom of the Layers tab.
Once you have filled each path with a color on a different layer, you are done color blocking the outsole! Day 2 is completed! Day 3 we will be adding textures and highlights to make it pop and look 3-dimensional. After that....color block the upper. Stay tuned peeps!
|
No comments:
Post a Comment