 |
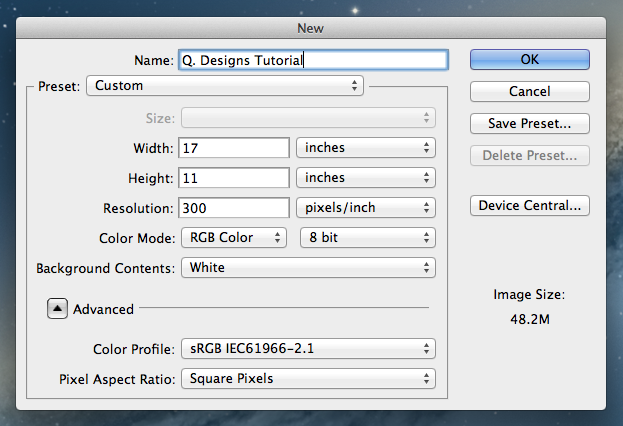
Today is Day 1 of my step-by-step tutorial of how to render a shoe. Today I will cover how to set your canvas up properly. It's always a good idea to start large because you can downsize without a problem. If you try to blow up a small image, you will get pixilation. First step! File > New >.
It will then bring you to the above page. Type in the name of the document, set your width to 17", your height to 11", and your resolution 300. This will give you a high definition picture.
Be sure your Color Mode is set to RGB Color and Background Contents set to White. Press OK.
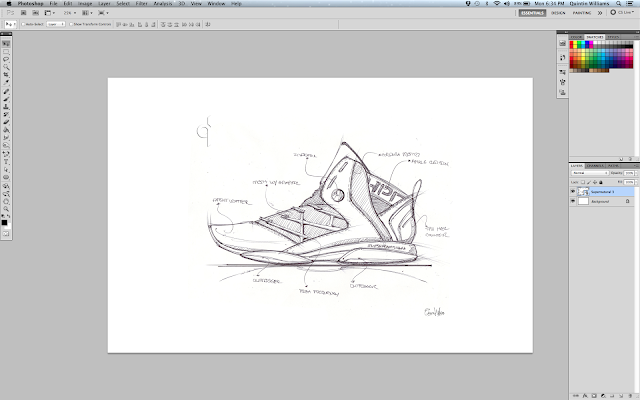
Once you see the blank canvas, click File > Place...> and insert your sketch onto the canvas. It should look like the above image.
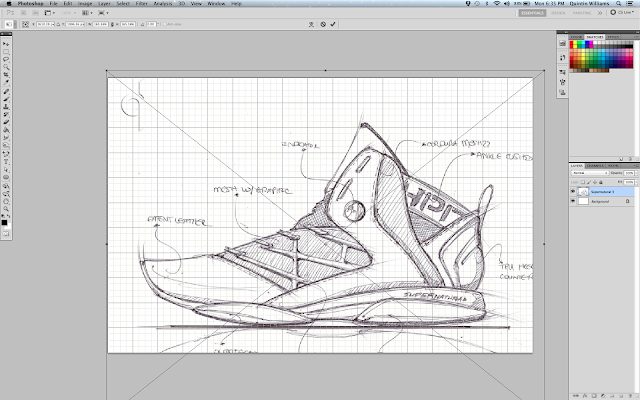
The next step is to enlarge the sketch to fill the page more. You do this by clicking the layer the sketch is on and hold keys Shift+Alt and drag a corner of the sketch outward. This will enlarge the sketch proportionally so it's not distorted. Once you're happy with the size of the image, Press Enter.
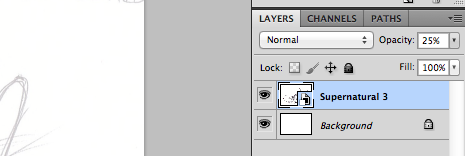
Next you want to lower the opacity of the layer your sketch is on, because you will only be using it as a template for your paths. You do this by clicking the layer and simply clicking the Opacity drop down box and scroll it to 25%.
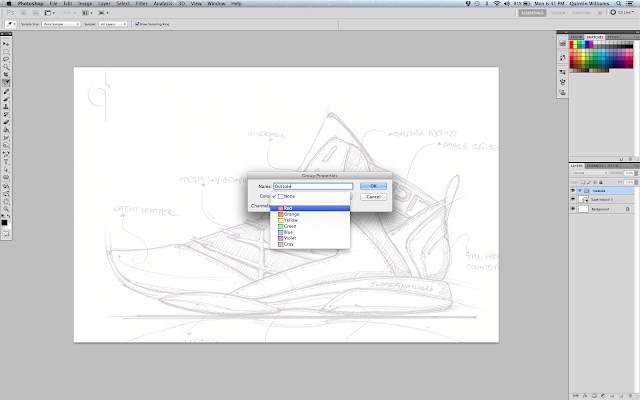
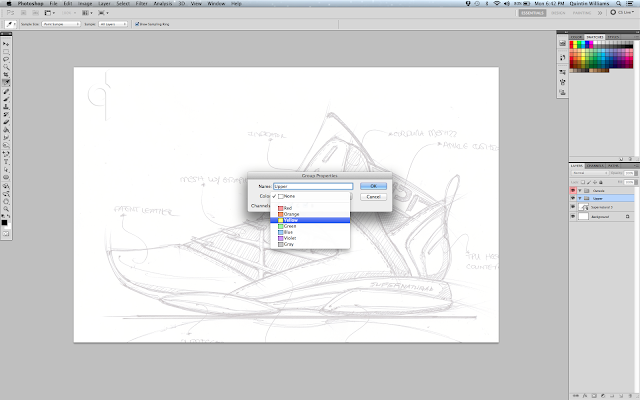
The next step is to get organized! You want to make two groups: Outsole and Upper. This will keep them separate in the future, and trust me there will be MANY layers so you will WANT to keep them separate!
You do this by clicking Layer > New > Group. Once you click Group, it will bring you to a dialog box that is pictured above. Name one Group as Outsole and pick a color for it. You will do the same exact steps to create a Group for the the Upper, but pick a different color. Be sure the Outsole Group is above the Upper Group.
 |
Once all of these steps are completed, your canvas page should like the above picture. This is the beginning of greatness! You have everything organized and ready to start outlining each section of the shoe using your pen tool. Day 2 we will begin rendering the outsole. Learned anything yet??! I hope so...much more to come! Deuces until next time.


No comments:
Post a Comment